
Tiling transforms any space, but poor installation can turn your dream bathroom or kitchen into a costly nightmare. Whether you're planning a complete renovation or simply refreshing tired surfaces, understanding common tiling mistakes helps you achieve professional results that stand the test of time.
At Swanbourne Construction Ltd, we've seen countless DIY disasters and rushed professional jobs that could have been avoided with proper planning and technique. From waterproofing failures to wonky layouts, these mistakes don't just look unsightly: they can lead to structural damage, mold growth, and expensive remedial work.
Let's explore the most frequent tiling errors and how to prevent them, ensuring your next project delivers the stunning, durable finish you deserve.
Surface Preparation: The Foundation of Success
Poor surface preparation ranks as the number one cause of tiling failures. This critical first step determines whether your tiles will stay put for decades or start lifting within months.
Every surface must be completely clean, dry, and level before any adhesive touches it. Remove all existing coatings, residue, paint flakes, and loose material. Even tiny particles of dust or grease can prevent proper adhesion, creating weak spots that eventually fail.
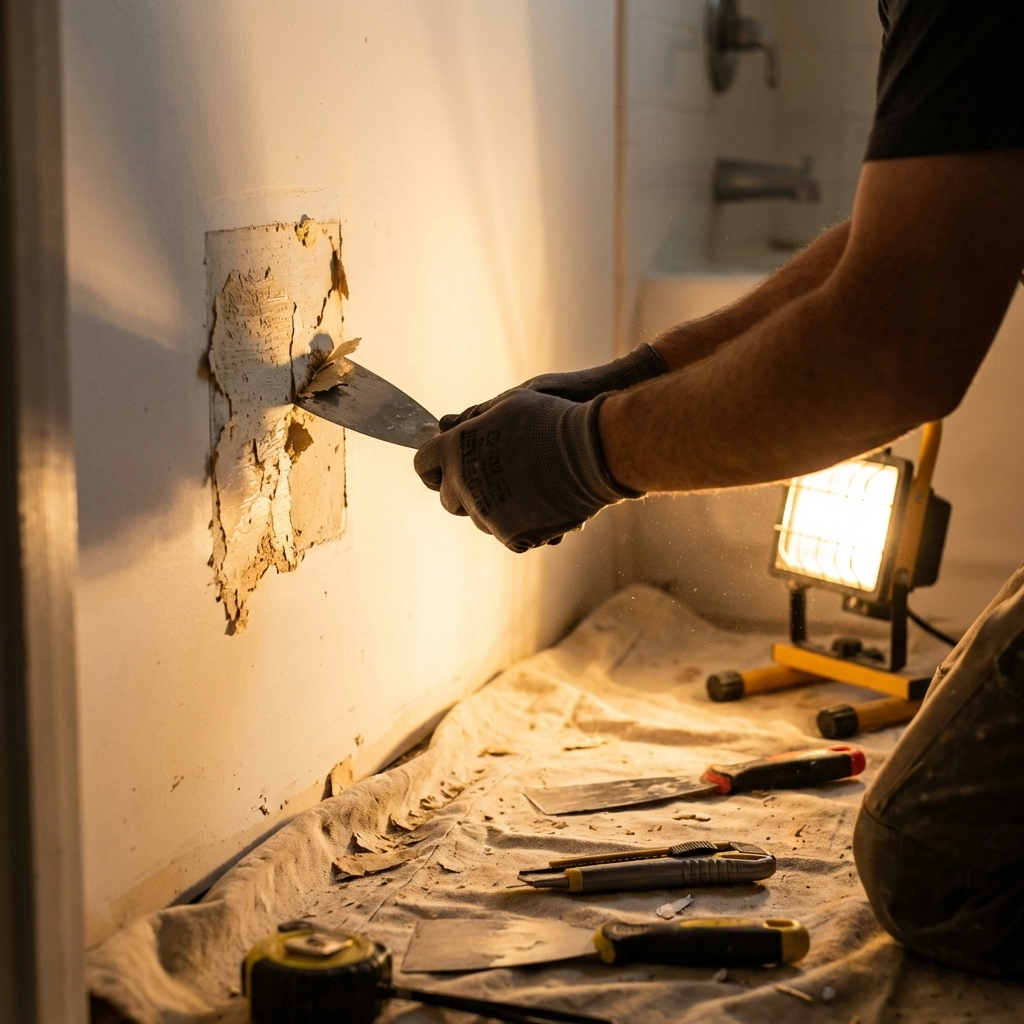
Drywall presents particular challenges in moisture-prone areas. Standard plasterboard simply isn't suitable for wet environments like shower areas or behind kitchen sinks. Always use appropriate backer boards or tanking systems in these locations to prevent water penetration that leads to structural damage and mold growth.
Level surfaces matter more than you might think. Even minor irregularities become magnified once tiles are installed, creating lippage (uneven tile edges) that looks unprofessional and creates cleaning difficulties. Use a straight edge to check for high spots and dips, addressing these issues before tiling begins.
The preparation phase might seem tedious, but it's where professional bathroom installation services prove their worth. Rushing this stage to save time inevitably costs more in the long run.
Layout Planning: Measure Twice, Tile Once
Failing to plan your layout properly creates problems that become increasingly expensive to fix as work progresses. Many homeowners start tiling from one corner and adjust as they go, only to discover their pattern looks wonky or they're left with awkward cuts in prominent areas.
Always start from the center of your space and work outward. This ensures balanced layouts with equal cuts on opposite sides, creating visual symmetry that looks intentional and professional.
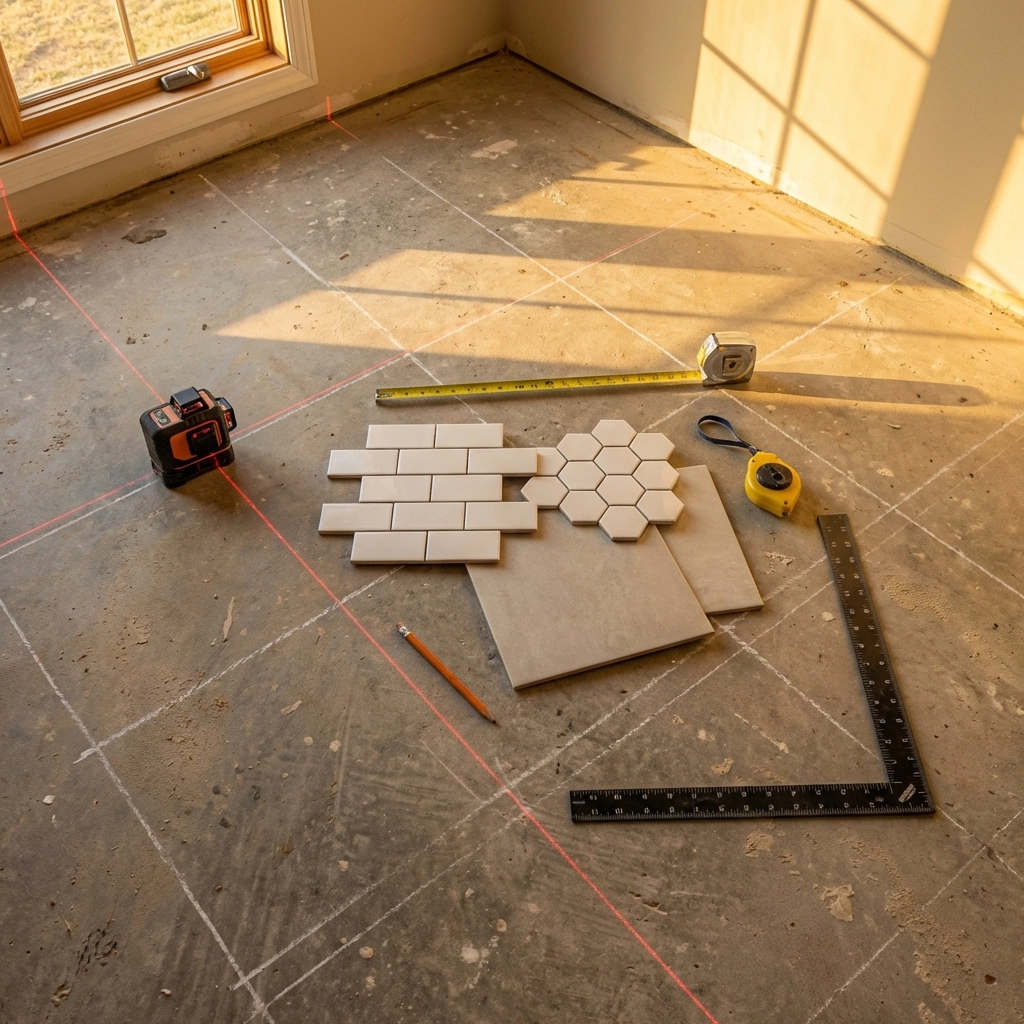
Consider your focal points carefully. Position full tiles in the most visible areas, relegating cuts to less prominent edges. In bathrooms, this typically means the wall opposite the entrance gets priority, while cuts can be hidden behind the toilet or in corners.
Account for out-of-square walls and sloping floors: they're more common than perfect surfaces. Use chalk lines and laser levels to establish true reference points rather than trusting existing walls or fixtures as guides.
Pattern placement requires special attention. Random or haphazard patterns might seem easier but actually require more skill to execute well. Stick to established patterns unless you have significant experience, as mistakes in complex layouts become very obvious once complete.
Adhesive Application: Getting the Foundation Right
Incorrect adhesive selection and application causes numerous failures, from tiles that won't stick initially to those that lift months later. Not all adhesives suit every application: waterproof formulations are essential in wet areas, while standard adhesives work fine in dry environments.
Uneven adhesive application creates problems as the material shrinks during curing. Applying adhesive in random spots or using incorrect trowel techniques leads to inconsistent support, causing tiles to crack under pressure or become loose over time.
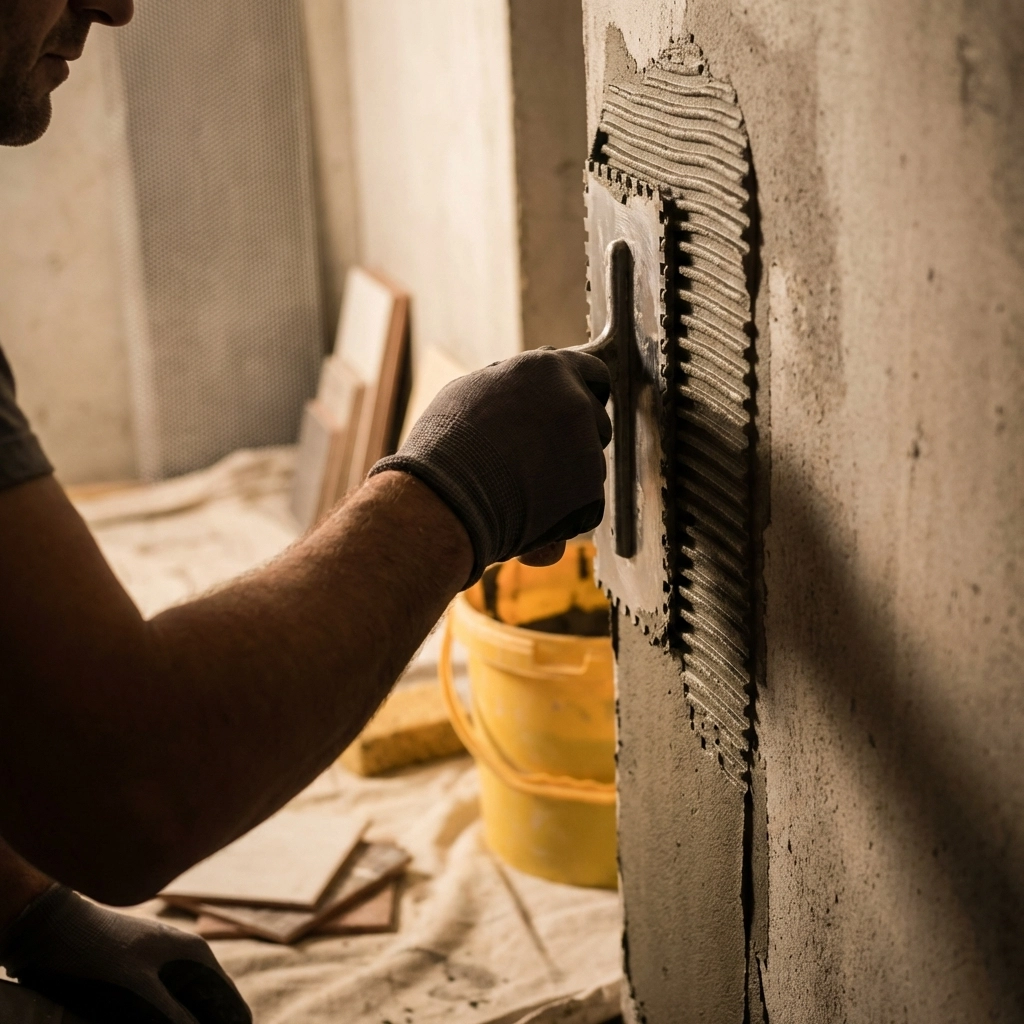
Use the correct notched trowel size for your tile dimensions. Small tiles need small notches, while large format tiles require deeper notches to ensure adequate coverage. The goal is achieving 95% contact between tile and substrate: anything less compromises long-term performance.
Timing matters with adhesives. Working time varies by product and environmental conditions, but you typically have 15-30 minutes once adhesive is applied. Don't spread more than you can tile within this window, as skinned-over adhesive won't bond properly.
Pot life awareness prevents waste and ensures proper bonding. Mixed adhesives have limited working time before they begin setting in the bucket. Mix only what you can use within the specified timeframe.
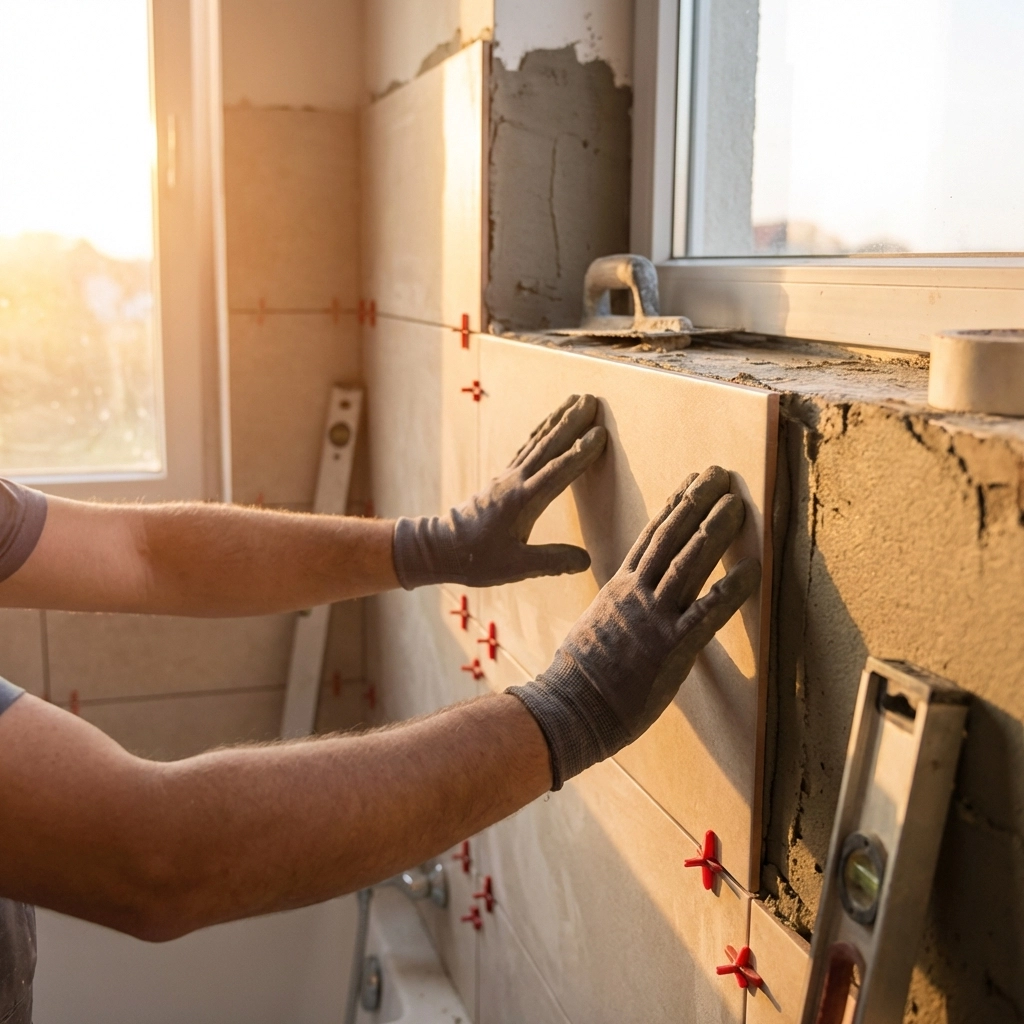
Spacing and Alignment: Precision Makes Perfect
Inconsistent spacing immediately identifies amateur work. Professional results require uniform gaps throughout the installation, achieved using proper spacers rather than relying on eye measurement.
Choose appropriate spacer sizes for your tile type and intended use. Natural stone often benefits from wider joints to accommodate slight size variations, while precision-manufactured ceramics can use minimal spacing for contemporary looks.
Don't rely solely on built-in lugs found on some tile edges. These manufacturing features aren't designed as spacing systems and often create inconsistent gaps. Always use separate spacers for reliable results.
Lippage control becomes critical with larger tiles. Slight height differences between adjacent tiles create unsightly and potentially dangerous stepped edges. Use leveling systems or wedges during installation to maintain flush surfaces.
Remove spacers before grout application: leaving them in place creates weak spots and discoloration. However, don't remove them too early while adhesive is still soft, as this can disturb tile positioning.
Grouting: The Final Critical Step
Poor grouting techniques undermine even perfect tile installation. Grout serves structural and waterproofing functions beyond simply filling gaps, making proper application essential for long-term success.
Grout haze creates persistent cloudy films on tile surfaces, particularly problematic with porous materials like natural stone. Clean grout residue immediately with damp sponges, working diagonally across joints to avoid disturbing fresh grout lines.
Mixing consistency affects performance. Grout should have toothpaste-like consistency: not too wet (which causes shrinkage and weakness) nor too dry (preventing proper penetration into joints). Follow manufacturer instructions precisely for water ratios.
Timing grout application requires patience. Adhesive must fully cure before grouting begins, typically 24 hours minimum. Rushing this stage risks disturbing tile positioning and compromising adhesive bonds.
Choose appropriate grout types for your application. Cement-based grouts suit most applications but require sealing in wet areas. Epoxy grouts offer superior water resistance but prove more challenging to work with and require specific techniques.
Waterproofing: Prevention Better Than Cure
Inadequate waterproofing causes the most expensive failures, often requiring complete removal and reinstallation to address underlying damage. This mistake proves particularly costly in bathrooms and kitchens where water penetration can affect structural elements.
Tanking systems provide essential moisture barriers in wet areas. These must extend beyond the immediate tile area to prevent water finding alternative paths into wall and floor structures. Don't skimp on coverage areas: waterproofing slightly more area costs far less than addressing water damage later.
Joint sealing requires ongoing maintenance. Silicone seals around baths, showers, and basins deteriorate over time, requiring periodic renewal to maintain waterproof integrity. Use appropriate sealants for each application: some work better with natural movement while others suit static joints.
Drainage considerations matter in shower areas. Floors must slope correctly toward drains, and waterproofing must integrate properly with drainage systems. Puddle testing ensures proper falls before tiling begins.
Professional Installation: Investment in Quality
While DIY tiling appeals to many homeowners, professional installation delivers results that justify the investment through longevity, appearance, and peace of mind. Experienced contractors understand material behaviors, possess proper tools, and know how to address unexpected challenges that inevitably arise.
At Swanbourne Construction Ltd, our tiling specialists combine technical expertise with aesthetic sensibility, ensuring installations that perform beautifully for years to come. We understand local building requirements, moisture management techniques, and the specific challenges presented by West Sussex properties.
Quality materials and proper techniques cost more initially but prove economical over time through reduced maintenance needs and longer service life. Professional installation also typically includes warranties that protect your investment.
Expert problem-solving becomes invaluable when unexpected issues arise. Experienced contractors can adapt to structural irregularities, plumbing complications, or material variations without compromising final results.
Moving Forward with Confidence
Understanding common tiling mistakes empowers better decision-making whether you're tackling the work yourself or selecting contractors for your project. Quality installation requires patience, proper materials, and meticulous attention to detail: shortcuts inevitably create problems that cost more to fix than doing the job correctly initially.
Ready to transform your space with professional tiling that stands the test of time? Contact Swanbourne Construction Ltd for expert guidance and installation services throughout West Sussex. Our team ensures every project meets the highest standards for both appearance and durability.