
If you're planning a kitchen renovation in West Sussex, you've probably found yourself asking one crucial question: should the flooring go down before the units, or the other way around?
It's one of the most common queries we hear from homeowners across Bognor Regis, Chichester, and Arundel: and getting the answer wrong can lead to costly mistakes, awkward finishes, and headaches down the line.
The good news? There's a clear logic to the order of works, and once you understand it, your kitchen renovation will flow much more smoothly. Let's break it down.
Why Does the Order Even Matter?
You might think it's a minor detail. Surely it doesn't matter whether the flooring goes in before or after the kitchen units?
Actually, it matters quite a lot.
The sequence you choose affects:
- The overall finish and appearance of your kitchen
- Future flexibility when replacing appliances or updating units
- How your appliances sit relative to your worktops
- The longevity of your flooring material
- Your renovation budget
Getting this wrong can mean uneven appliances, visible gaps around your units, or flooring that buckles and warps within months. None of which you want in a kitchen you've invested thousands of pounds into.
The Short Answer: Flooring First (Usually)
In roughly 90% of kitchen renovations, we recommend installing the flooring before the units go in. This is the standard approach used by experienced kitchen fitters throughout West Sussex and across the UK: and for good reason.
Here's why flooring first makes sense for most projects:
1. Future-Proofing Your Kitchen
Life changes. Appliances break down. Styles evolve. If your flooring runs continuously beneath your units and appliances, you've got complete flexibility for the future.
Need to swap out your fridge-freezer for a larger model? No problem: there's floor beneath it. Fancy updating your base units in ten years? You won't be left with unsightly gaps or mismatched flooring where the old ones stood.
For homeowners in Chichester and Arundel: where period properties and character homes are common: this flexibility is especially valuable. Kitchens in older homes often need to adapt as families grow or circumstances change.
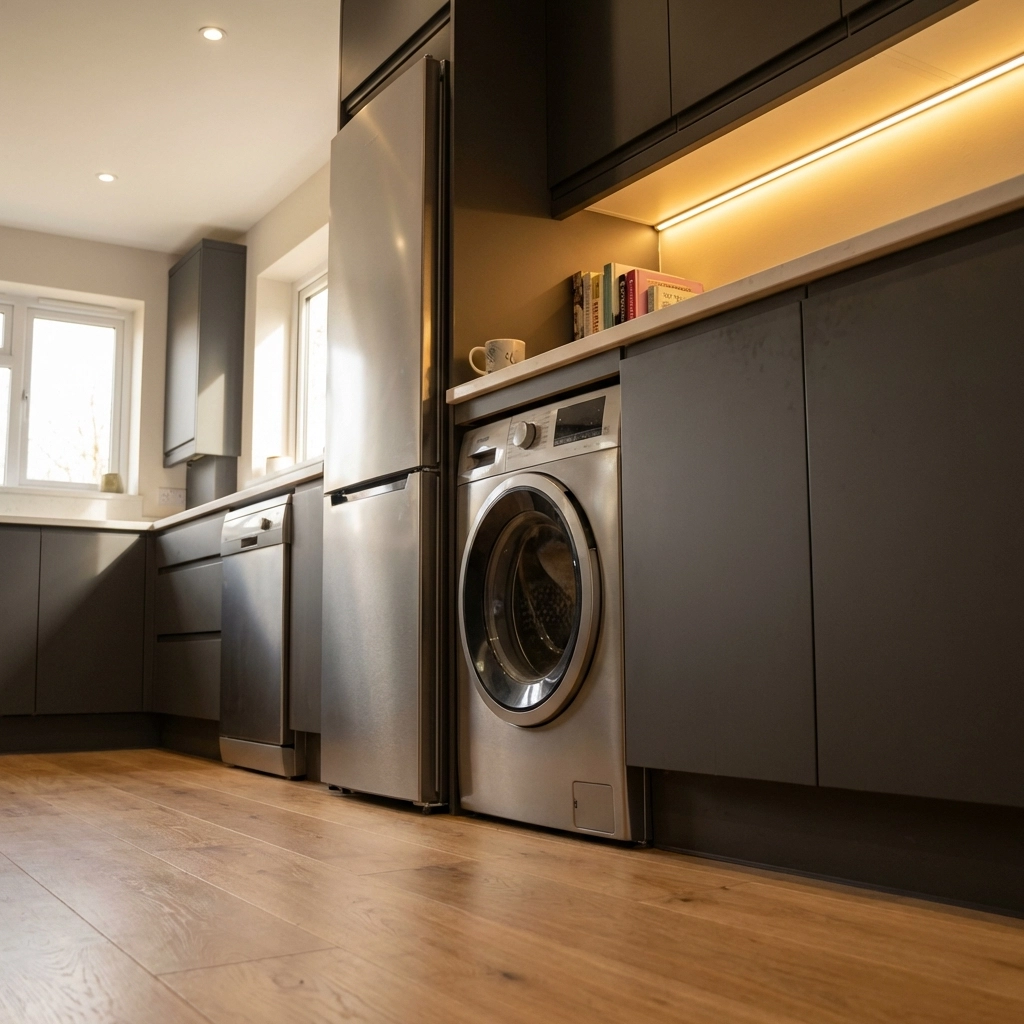
2. Consistent Appliance Height
When flooring is installed first, everything sits at the same level. Your dishwasher, washing machine, and fridge-freezer all align perfectly with your worktops and cabinetry.
Install units first, and your appliances end up sitting lower than your worktops (because they're on the subfloor rather than the finished floor). This creates an uneven look and can cause functional issues: imagine a dishwasher door that doesn't open properly because it's catching on the floor.
3. A Better Foundation
Subfloors aren't always perfectly level: especially in older properties across Bognor Regis and the surrounding villages. Laying your finished flooring first gives you a smooth, even base on which to install your units.
This creates a cleaner, more professional finish and makes the fitting process far easier for your kitchen installer.
4. Cleaner Workflow
Starting with the flooring creates what we call a "clean playing field." Your fitters work on a finished surface from day one, which helps protect the subfloor and gives a clear reference point for positioning units accurately.
It also means less back-and-forth between trades. Flooring goes in, then units, then appliances, then finishing touches. Simple, logical, efficient.
When Should Units Go In First?
There's always an exception to the rule. In some cases, installing your kitchen units before the flooring is the smarter choice.
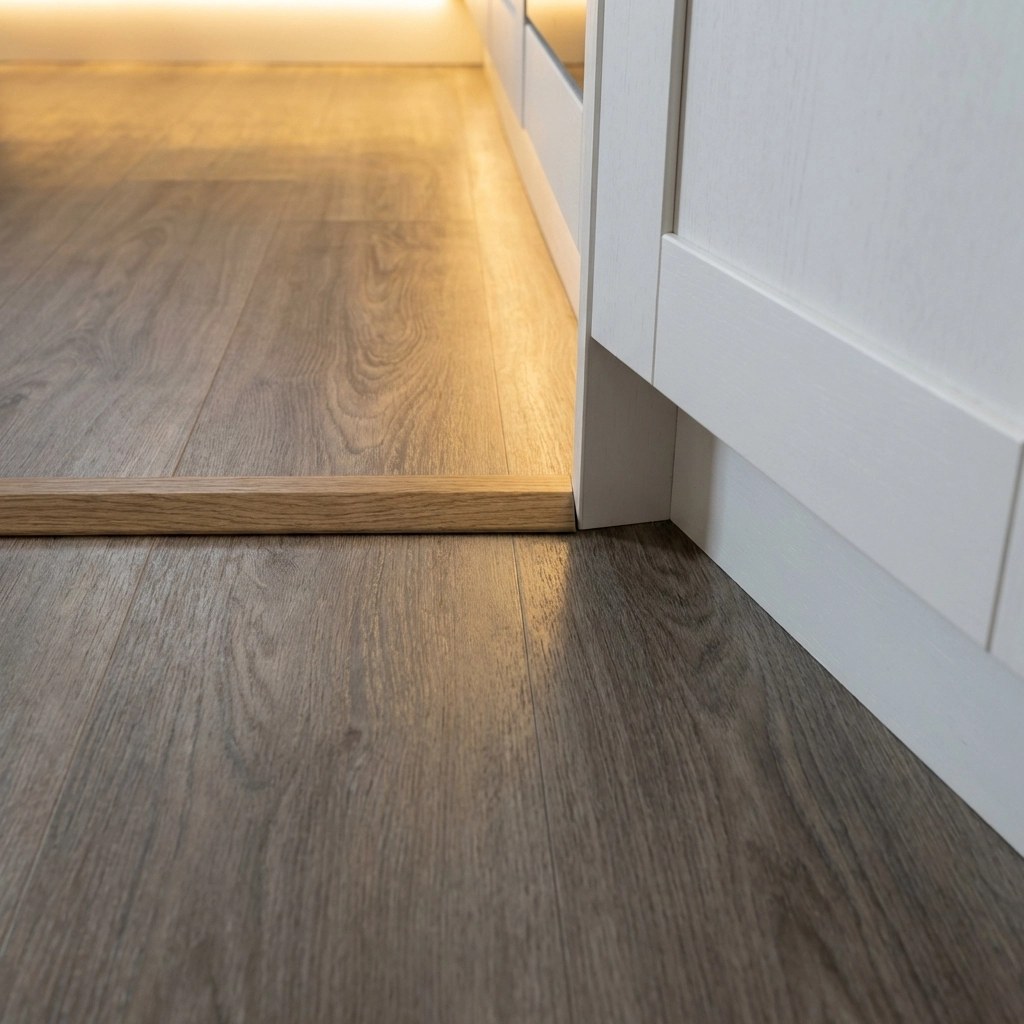
Floating Floors Need Units First
If you're opting for a floating floor: such as laminate, certain vinyl planks, or engineered hardwood: the units should be installed first.
Why? Floating floors aren't fixed to the subfloor. They need room to expand and contract naturally with temperature and humidity changes. If you place heavy kitchen units on top of a floating floor, you restrict this movement, which can lead to:
- Buckling across the floor surface
- Warping at edges and joins
- Gaps appearing between planks
- Creaking and noise underfoot
The solution is simple: fit your units directly onto the subfloor, then run the floating floor up to meet them. A neat trim or beading covers the expansion gap, and your floor can move freely without causing problems.
This is particularly relevant for homeowners choosing cost-effective laminate or luxury vinyl plank (LVP) flooring: popular choices in rental properties and family homes throughout West Sussex.
Budget Considerations
Installing units first does reduce your flooring material costs slightly. After all, you're not paying to floor the areas hidden beneath your cabinets.
However, for most homeowners, the modest saving isn't worth sacrificing the future flexibility and professional finish that flooring-first provides. It's a classic case of spending a little more now to save hassle and expense later.
Material-by-Material Guide
Still unsure which approach suits your project? Here's a quick breakdown by flooring type:
| Flooring Material | Install Before or After Units? |
|---|---|
| Ceramic or porcelain tiles | Before – needs a continuous, stable base |
| Natural stone tiles | Before – same as ceramic, plus weight considerations |
| Solid hardwood | Before – prevents height misalignment |
| Engineered hardwood (glued) | Before – stable when fixed to subfloor |
| Engineered hardwood (floating) | After – needs room to expand |
| Laminate | After – floating installation requires movement |
| Luxury vinyl plank (glued) | Before – stable once adhered |
| Luxury vinyl plank (floating/click) | After – expansion room needed |
| Sheet vinyl | Before – creates seamless base |
If you're not sure which category your chosen flooring falls into, your supplier or fitter should be able to advise. Or, if you're working with a trusted local builder in Bognor Regis, they'll guide you through the decision as part of your renovation planning.
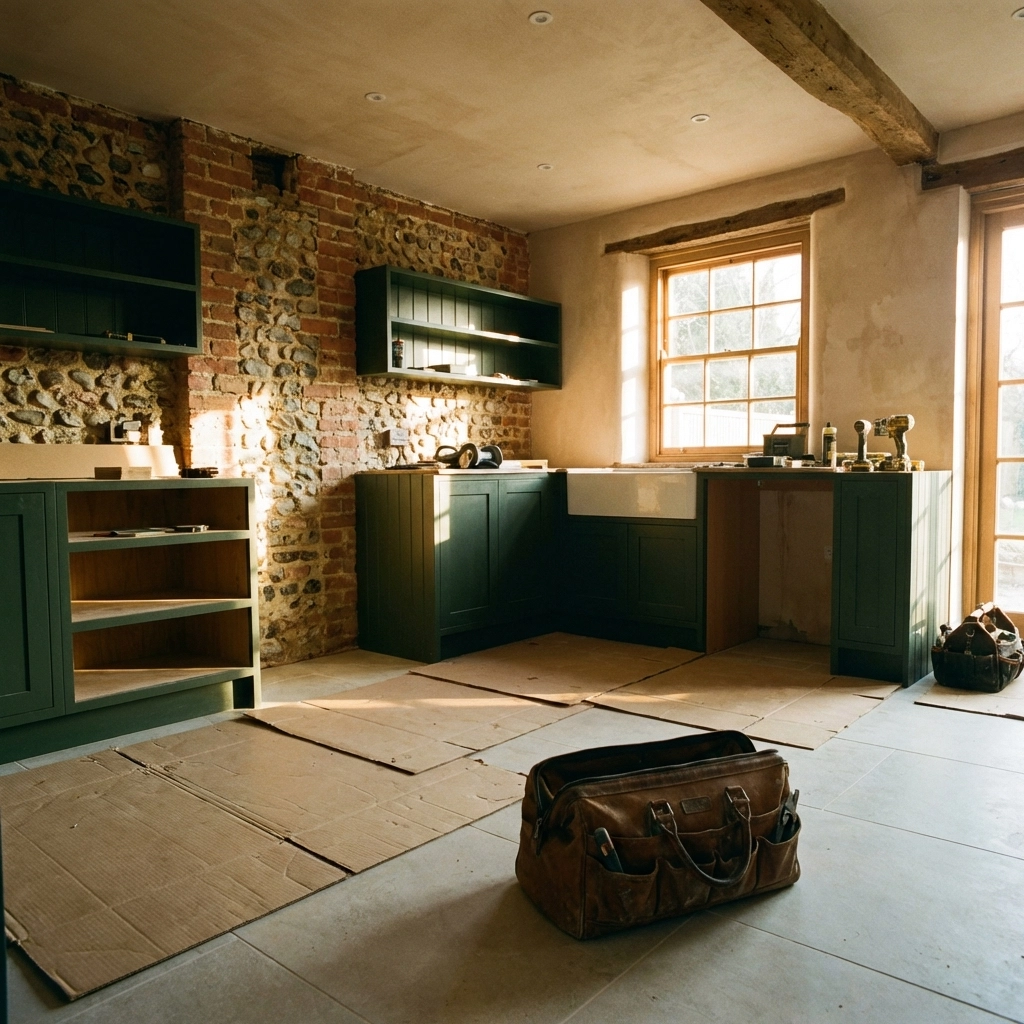
The Full Kitchen Renovation Sequence
Understanding where flooring fits within the broader renovation timeline helps you plan effectively. Here's the typical order of works for a kitchen renovation in West Sussex:
- Strip out – Remove old units, appliances, flooring, and any fixtures
- First fix – Plumbing and electrical rough-in (moving pipes, adding sockets, etc.)
- Plastering and making good – Walls and ceilings prepared
- Flooring installation – Assuming you're going flooring-first
- Unit installation – Base units, wall units, and carcasses fitted
- Worktop fitting – Templated and installed (granite/quartz may require a second visit)
- Second fix – Final plumbing and electrical connections
- Appliance installation – Integrated and freestanding appliances fitted
- Tiling and splashbacks – Behind hob, sink, and worktops
- Finishing touches – Handles, plinths, lighting, decorating
This sequence ensures each trade follows logically from the last, minimising delays and keeping your project on track.
Protecting Your New Flooring During Installation
One concern homeowners often raise is damage to new flooring during unit installation. It's a valid worry: nobody wants scratches or scuffs on a beautiful new floor before the kitchen is even finished.
The solution is straightforward: protect the floor properly.
Good kitchen fitters lay protective sheeting, cardboard, or hardboard over newly installed floors before any unit work begins. Heavy items are lifted rather than dragged. Care is taken at every stage.
At Swanbourne Construction, we take pride in leaving properties clean and undamaged. Our attention to detail throughout the build process means your flooring stays pristine while we complete the installation. You can see examples of our careful workmanship in our previous projects.
Planning Your Kitchen Renovation in West Sussex
Whether you're updating a tired kitchen in Felpham, creating a modern cooking space in Aldwick, or undertaking a complete renovation in Middleton-on-Sea, the flooring question is just one piece of the puzzle.
A successful kitchen renovation depends on:
- Clear planning from the outset
- Choosing the right materials for your lifestyle and budget
- Working with experienced professionals who understand the logical sequence of works
- Realistic timelines that account for material lead times and fitting schedules
Most kitchen renovations in West Sussex take between 4 and 8 weeks from strip-out to completion, depending on the scope of work and complexity of the design. Starting with a clear plan: including decisions like flooring sequence: helps keep everything running smoothly.
Ready to Start Your Kitchen Project?
If you're considering a kitchen renovation in Bognor Regis, Chichester, Arundel, or anywhere across West Sussex, we'd love to help you plan it properly.
At Swanbourne Construction, we handle kitchen renovations from start to finish: including all those decisions about sequencing, materials, and timelines that can feel overwhelming when you're going it alone.
Get in touch for a free, no-obligation consultation. We'll talk through your ideas, assess your space, and give you honest advice on the best approach for your home and budget.
Call us on 07470 078236 or drop us a message to get started.